Adding a domain
Whether you have just registered or you need to add a new site in SniperFast Manager, the system will guide you through a series of steps to follow. In the first case you will immediately see the onboarding screen, in the second case you only need to click on the New button in the top left-hand corner.
Platform selection
The first step consists in choosing the platform you built your e-commerce with. This option will determine the next sections, depending on whether or not a dedicated plugin is available to install on the website.
Prestashop / WooCommerce
These two platforms offer a dedicated plugin. Once you click Next, the Manager will offer you the link from which to download it.
Proceed to install it on your website and follow the instructions that you will find in the plugin: you will then be able to choose the languages to be exported and generate the first file that will be used to display the search results.
Once you have finished the procedure, go back to the Manager and click on the logo in the top left-hand corner to load the summary panel for the domain you have just added.
Magento / Custom
As a first step it is required to add the domain you are performing the installation on. Make sure that the link provided is correct: if your website is shown as
mywebsite.com/en
mywebsite.com/index.php
mywebsite.com/index.html
make sure to remove the additional parts that don’t belong to the domain. In the example above here you will have to write mywebsite.com only.
In order to finish the installation on a Magento platform or on a custom, developed specifically for a customer, you have to provide the system with a file containing the information required to display the search results.
The Manager offers you an example file to download so that you can generate it as expected by the system, either in SniperFast or Google Shopping format. Click on the respective Show file format button to display the download link and an explanation of how it should be compiled.
If you have a customised one, choose the respective file type and perform the necessary mappings to tell the system where to read title, description, sku, etc.
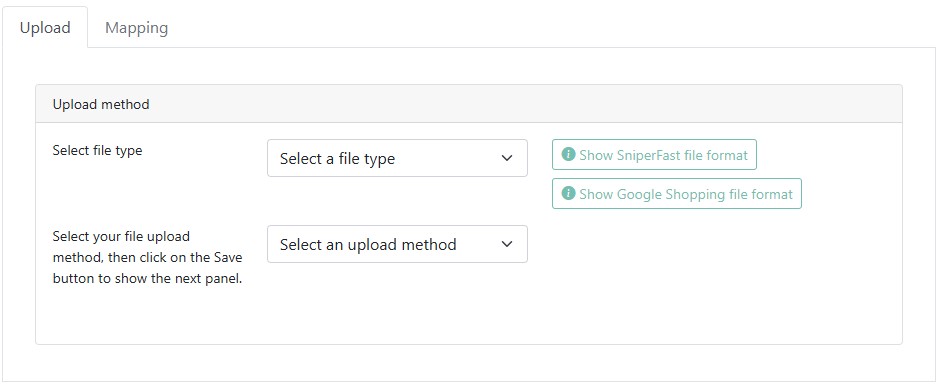
Once you have entered the separator of the various fields and indicated whether the file has a header or not, map the various columns and click on Save. You will be taken to the next step, where you will be shown the processing status of the file.
Nota bene: in order for the search to work properly, ensure that the file provided contains at least the following basic information.
- ID product
- Product title
- Product link
- Price
- Reference (SKU)
- Image (if possible select a format close to 250 x 250 pixel)
Fields like categories, manufacturer, features and attributes are not mandatory, but at least the first two are highly recommended in order to generate the respective search fields.

Wait for the bar to reach 100%, then you will be able to move to the next step.
To ensure that search results show up once you place the mouse inside of your website’s search bar, click on Select within the Positioning and choose the element in the box below.
If your site does not load correctly, you can always specify the HTML tag that needs to be detected manually by following this video guide.
All you have now to do is to move to the last section, where you will have to click on Get code, at the top: you will receive the link you need to copy on your website to load the mandatory files required for SniperFast to work properly.